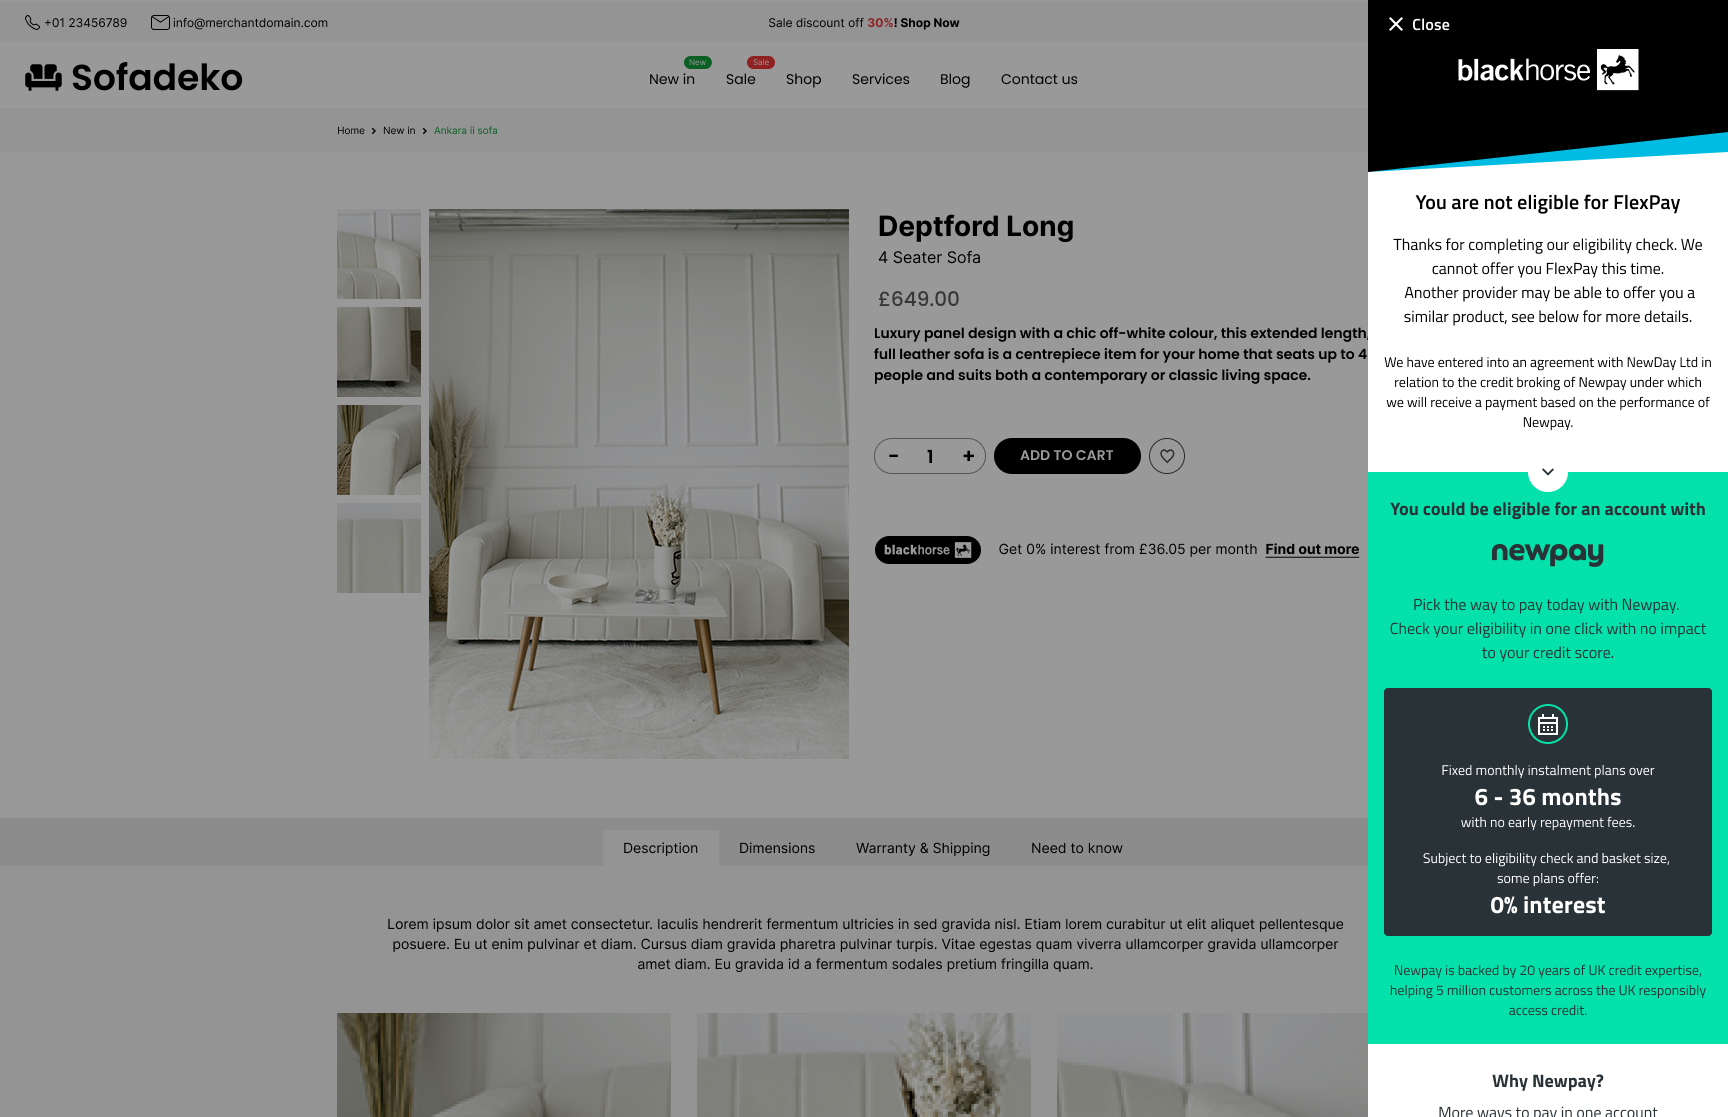
One of the advantages of Black Horse FlexPay is having access to a second lender. Customers initially apply for FlexPay, but if they are not approved, they can choose to check their eligibility with a secondary lender called NewDay, who offer a product called Newpay, without the need to complete another application. This can help you maximise acceptance and customer conversion relative to other providers.

We'll automatically take care of the experience and counteroffer process, should your customer not be eligible for FlexPay. This will be presented to a customer only after an unsuccessful FlexPay eligibility check, outside checkout prior to purchasing, or as part of the checkout step.
Tile after counter offerIf the customer is successful in being counter offered and approved as eligible for the Newpay product, the tile (if shown on your website) will automatically update to Newpay branding and signpost if the customer is already pre-approved for a line of credit.

The customer is introduced to the Newpay product and can establish their eligibility and potential credit line without having to enter any additional data. This means that your website will be creating additional customers who can use finance via either FlexPay or the alternative Newpay product.
Additional Integration
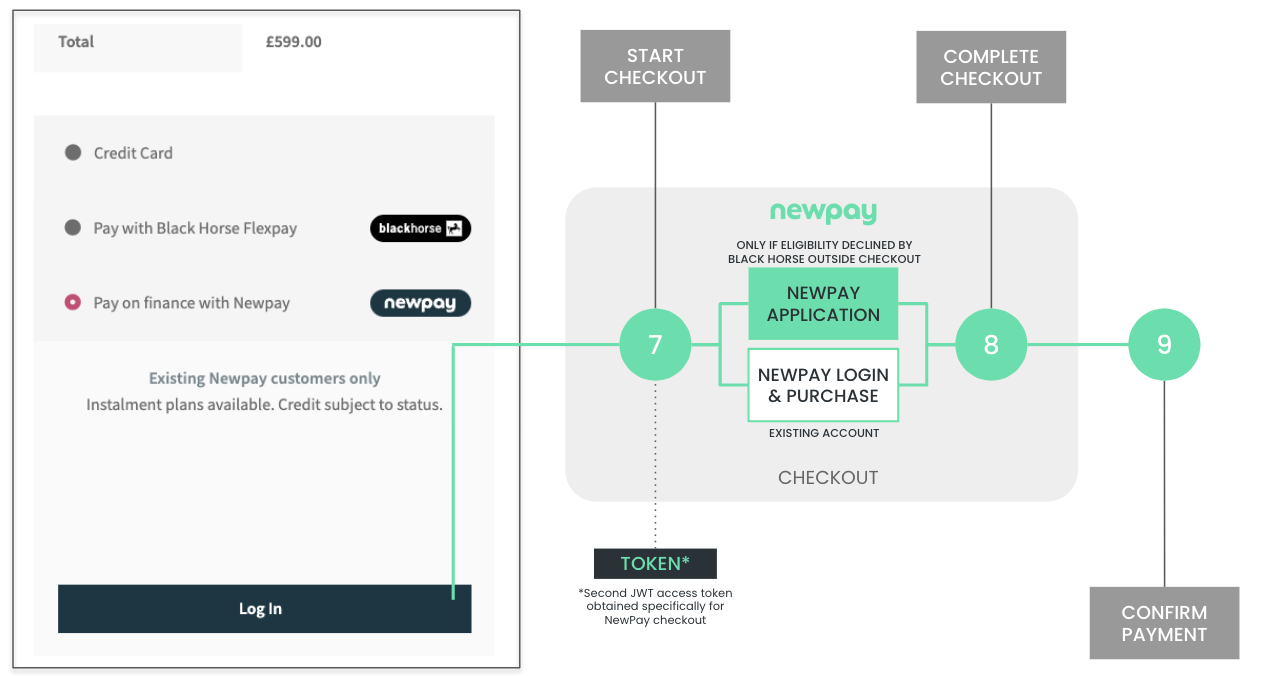
This does mean that there is one additional integration task before completing your integration and going live. To support the dual lender offering, you will need to add a Newpay payment option in checkout alongside FlexPay. This will be required by your customers for one of two reasons:
- Customers who perform an eligibility check outside checkout and are declined for FlexPay and accepted for Newpay, who will then need to see a Newpay option at checkout in order to complete their application
- Returning customers who had previously opened a Newpay credit account after being declined for FlexPay and who are now visiting your site with an existing line of credit for Newpay with which to purchase
In either case they will need to be able to select NewPay in checkout and submit a Newpay purchase. This will reuse the same FlexPay Widget you have implemented and is identical to how you will have implemented the FlexPay start checkout step - but will require a different JWT access token.

Submit Newpay Purchase
As with FlexPay, you will first need to submit details of the customer and their proposed Newpay purchase, via API to the verify-basket endpoint, which will return an additional JWT access token. This token confirms to the FlexPay Widget that the intended Newpay purchase is valid and authenticated.
The verify-basket call for Newpay is identical to that which is specified for FlexPay in start checkout, however you will be supplying a different finance product name in theproducts array, in this case newpay rather than blackhorse-flexpay. In response, you receive the additional JWT.
Launch Newpay Finance
As with FlexPay, you initiate the Newpay checkout step via a button press, form submission or other page action. You need to use your Newpay specific JWT access token obtained as above, with the widget.checkout() function below (as also performed for FlexPay) to trigger the transaction process.
The function you pass to the flexpayWidget.checkout method must make a request to your server which in turn should request the checkout access token for Newpay from the FlexPay API. The return type of your function should be a Promise that resolves to the JWT token retrieved by your server.
const yourCheckoutFunction = () => {
  return Promise.resolve(myCheckoutToken);
}

// Note using the wallet instance created in the Initialise step above.
widget.checkout(yourCheckoutFunction);
Note: both FlexPay and Newpay share the same embedded finance widget you have implemented, which means that either journey will appear in the same page overlay, replacing the other. As before, you can also use Javascript commands to manually open and close the widget if you need to:
widget.close();
widget.open();